In this article, we will delve into 11 of the most popular camera angles for photographers that every beginner should know. Each camera angle, from close-ups to long shots, offers a unique point of view and can elicit distinct emotions and meanings, resulting in powerful and captivating photographs. Camera angles in photography refer to the position and perspective from which a photograph is taken. They are critical components in crafting the composition and narrative of an image, making them essential knowledge for any aspiring photographer.
Photography is a captivating art form that enables us to immortalize moments in time. Whether you are an amateur or a seasoned photographer, mastering camera angles is crucial to create visually stunning and impactful images. Whether you are seeking to capture a beautiful landscape, an intimate portrait, or a bustling cityscape, mastering camera angles will enhance your ability to tell a compelling visual story. Join us on this journey and discover the art of photography through the lens of camera angles.
Related Articles:
Top 12 Highest Paid Photographers in the World
Differences between JPEG and PDF File Formats
What you’ll learn in this article
11 Popular Camera Angles for Photographers
Throughout this comprehensive guide, we’ll provide you with a complete understanding of 11 popular camera angles for photographers. We’ll delve into the definition of each camera angle, provide you with real-life examples of how professionals use them in photography, and offer practical tips to help you take stunning shots using each angle.
Whether you’re a beginner or an experienced photographer, understanding camera angles is an essential aspect of capturing visually stunning and impactful images. Each camera angle, from low-angle shots to bird’s-eye views, brings its unique perspective to your photographs, enabling you to tell compelling visual stories.
By the end of this guide, you’ll have the knowledge and confidence to incorporate various camera angles into your photography, adding depth, emotion, and meaning to your images. Join us on this journey and elevate your photography skills with these 11 popular camera angles.
1.The Close-Up Shot and Its ability to Reveal the Details
Close-up photography is an effective technique that captures a subject’s details, expressions, and emotions from a very close distance. This type of photography is widely used in portrait, product, and still-life photography to emphasize textures, patterns, and colors, as well as to bring attention to intricate details that would otherwise be missed from a wider angle.
Examples of close-up shots in photography include a person’s eyes, mouth, hands, or feet, a flower’s petal, a bee’s wings, or a piece of jewelry. These examples illustrate the range of subjects that can be effectively captured with close-up photography. By using this technique creatively, photographers can showcase the intricate details of their subjects and create a powerful visual impact.
Close-up shots are particularly effective in portrait photography, as they allow the photographer to capture the subject’s expressions and emotions in great detail. By filling the frame with the subject’s face, hands, or other body parts, the photographer can create an intimate and engaging image that draws the viewer’s attention to the subject’s unique features.
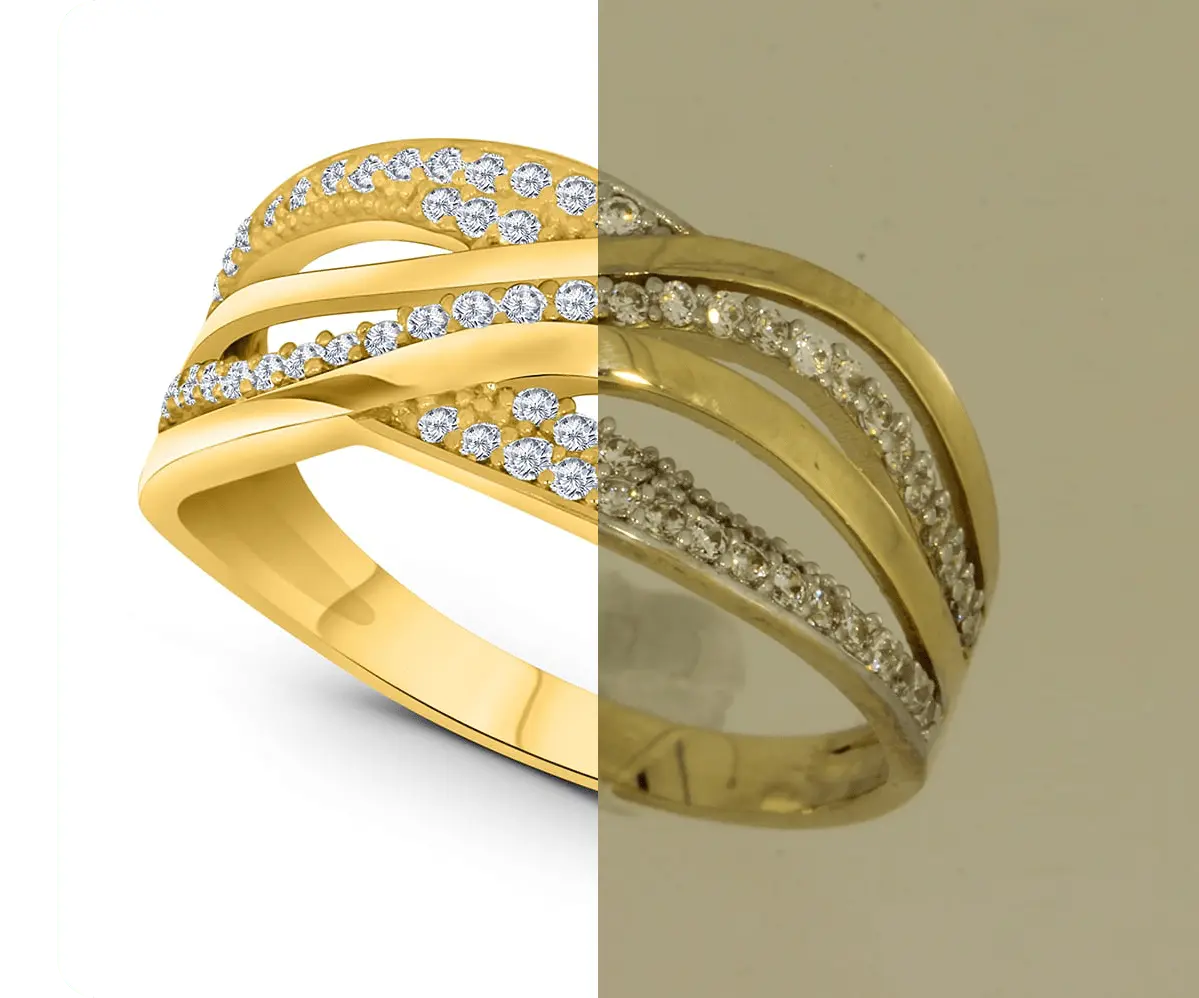
Product photography also benefits greatly from the use of close-up shots, as they allow the photographer to showcase the intricate details of the product, such as its texture, color, and design. This type of photography is widely used in the fashion and jewelry industries, where it is essential to capture the fine details of the products being sold.
Still-life photography is another area where close-up shots are widely used. By capturing the details of objects such as flowers, insects, and other small items, the photographer can create a sense of intimacy and depth that is not possible with wider shots. This type of photography is particularly popular in nature and wildlife photography, where it is essential to capture the beauty and intricacy of the natural world.
In conclusion, close-up photography is a powerful technique that allows photographers to capture the intricate details, emotions, and expressions of their subjects in great detail. By using this technique creatively, photographers can create engaging and impactful images that draw the viewer’s attention to the unique features of their subjects.
Here are some tips to help you take great close-up shots that showcase the beauty and complexity of your subject:
Choose the Right Lens
One of the most important factors in close-up photography is the lens you use. A macro lens is specifically designed for close-up photography and allows you to get incredibly sharp and detailed shots of your subject. If you don’t have a macro lens, you can still take close-up shots using a regular lens with a close-up filter. These filters screw onto the front of your lens and allow you to get closer to your subject.
Fill the Frame
When it comes to close-up photography, it’s all about the details. To emphasize the intricate details of your subject, get as close as possible and fill the frame with it. This will create a strong visual impact and draw the viewer’s eye to the details you want them to see.
Play with Depth of Field
Depth of field refers to the range of distance that appears acceptably sharp in your photo. In close-up photography, a shallow depth of field is often used to blur the background and make the subject stand out. To achieve this effect, use a wide aperture (low f-stop number) and focus on the part of the subject you want to be sharp.
Pay Attention to Lighting
Good lighting is crucial in close-up photography. Natural light is often the best option, as it is diffused and provides a soft, even light. If you’re shooting indoors, use a diffused artificial light source such as a softbox or umbrella to avoid harsh shadows. It’s also important to pay attention to the direction of the light – side lighting can help to bring out texture and detail in your subject.
Focus on the Eyes
In close-up shots of living subjects such as animals or people, it’s important to focus on the eyes to create a connection with the viewer. The eyes are often the most expressive part of the subject and can tell a story on their own. Use a single focus point to ensure that the eyes are sharp and in focus.
2.The Medium Shot and Its ability to Capture the Essence
A medium shot is a popular photography angle that captures a subject from the waist up or from the knees up. This type of shot is often used to provide context and show the subject’s body language and position. It is commonly used in portrait, fashion, and street photography to capture the subject’s personality and style, while also providing some environmental cues.
Examples of medium shots in photography include a person standing or sitting, a group of people, a building or architecture, or a landscape. By capturing the subject and their surroundings, medium shots can help to create a sense of place and provide a more complete visual story.
In portrait photography, medium shots are often used to capture the subject’s personality and style while also providing context about their environment. For example, a medium shot of a musician playing their instrument could show the musician’s expression and body language, while also showing the venue or setting of the performance.
In fashion photography, medium shots are often used to showcase the model’s outfit and style while also providing a sense of the environment they are in. By using medium shots creatively, photographers can create visually compelling images that capture the essence of the model and the clothing they are wearing.
Street photography is another area where medium shots are commonly used. By capturing people in their everyday environments, medium shots can provide a sense of the hustle and bustle of city life, while also capturing the unique personalities of the people who inhabit these spaces.
In conclusion, medium shots are a versatile and widely used photography angle that can capture a subject and their surroundings, providing context and a sense of place. By using this technique creatively, photographers can create visually engaging images that capture the essence of the subject and the environment they are in.
Here are some tips to help you take great medium shots that capture the essence of your subject:
Use the Rule of Thirds
The rule of thirds is a fundamental principle of composition in photography. It involves dividing your frame into thirds horizontally and vertically and placing your subject on one of the intersecting points. This creates a more dynamic and balanced composition and draws the viewer’s eye to the subject. Experiment with different placements of the subject within the frame to find the most effective composition.
Choose the Right Perspective
The perspective you choose can greatly impact the overall feel of your photo. Experiment with different angles and heights to create a sense of depth and perspective. A low angle can make the subject appear more powerful, while a high angle can create a sense of vulnerability. Consider the mood you want to convey and choose your perspective accordingly.
Include Some Context
Including the environment or background in your medium shots can add depth and context to your photos. It can also help to tell a story or convey a message. Consider using the background to provide some context to the subject and add interest to the shot.
Pay Attention to Lighting
Lighting plays a crucial role in photography and can greatly impact the overall mood and atmosphere of your photo. Use natural light or artificial light to create a mood or atmosphere that enhances the subject. Pay attention to the direction of light, as it can greatly impact the shadows and highlights in your photo. Experiment with different lighting setups to find the one that works best for your subject.
Adjust the Distance
The distance between the subject and the camera can greatly impact the composition and perspective of the shot. Experiment with different distances to find the right balance. Getting too close can create distortion, while being too far away can make the subject appear small and insignificant. Find the right distance that showcases the subject while also providing context and depth to the shot.
3. The long Shot and Its ability to Capture the Bigger Picture
A long shot, also known as a wide shot, is a photography technique that captures a subject or scene from a distance, providing context and perspective. This type of shot is commonly used in landscape, architecture, and cinematography to establish the setting, location, and environment of the subject.
Examples of long shots in photography include a city skyline, a mountain range, a beach scene, or a group of people in a large space. By using a long shot, photographers can capture the entirety of a subject or scene, giving viewers a sense of the vastness and scale of the environment.
In landscape photography, long shots are used to capture the beauty and grandeur of natural environments, such as mountain ranges, oceans, and forests. By using this technique, photographers can convey a sense of awe and wonder at the natural world, and provide viewers with a glimpse into the majesty of the environment.
In architectural photography, long shots are used to capture the entire building or structure, as well as its surrounding environment. By using this technique, photographers can convey a sense of the building’s place within its surroundings, and provide viewers with a comprehensive view of the structure’s design and details.
In cinematography, long shots are used to establish the setting and context of a scene. By capturing the entirety of the scene, long shots can provide viewers with a sense of the space and environment, and set the tone and mood for the scene.
In conclusion, long shots are a versatile and powerful photography technique that can capture the entirety of a subject or scene, providing context and perspective to viewers. By using this technique creatively, photographers can create visually stunning images that convey a sense of scale, majesty, and wonder.
Here are some tips to help you take great long shots that capture the essence of the surroundings:
Choose the Right Lens
Choosing the right lens is crucial for capturing great long shots. A wide-angle lens or a zoom lens can help you capture a wider field of view and more details in the distance. A wide-angle lens can also add a sense of depth and scale to the shot. Experiment with different lenses to find the one that works best for your subject and the environment.
Use the Foreground
Including some foreground elements can add depth and dimension to long shots. Look for interesting elements in the foreground, such as rocks, foliage, or water, to create a sense of perspective and draw the viewer’s eye into the scene. The foreground can also help to anchor the shot and provide context to the surroundings.
Find a Point of Interest
Look for a point of interest in the distance, such as a building, a tree, or a person, to create a focus for the shot. The point of interest can serve as a visual anchor and add interest and meaning to the shot. Experiment with different points of interest to find the one that works best for your subject and the environment.
Use a Tripod
A tripod can assist you in stabilizing the camera and avoiding camera shake, which is especially crucial for long exposures. A stable camera allows for sharper images and more control over the composition. Invest in a sturdy tripod that is easy to set up and adjust, and experiment with different heights and angles to find the most effective composition.
4. The High-Angle Shot and Its ability to See from Above
A high angle shot is a powerful photography technique that captures a subject from above, creating a sense of vulnerability, weakness, or inferiority. This technique is commonly used in cinematography, portrait, and documentary photography to convey a particular mood or message.
Examples of high angle shots in photography include a person lying down, a child looking up, a bird’s-eye view of a landscape, or a group of people from a balcony or rooftop. By capturing the subject from a higher position, photographers can emphasize the subject’s position in relation to their environment, and create a sense of separation or isolation.
In portrait photography, high angle shots are used to create a sense of vulnerability or intimacy. By capturing the subject from above, photographers can create an intimate connection between the subject and the viewer, and convey a sense of openness or trust.
In cinematography, high angle shots are used to create a particular mood or emotion. By capturing a scene from above, filmmakers can convey a sense of tension or suspense, or emphasize the power dynamics between characters.
In documentary photography, high angle shots are used to provide context and perspective. By capturing a scene from above, photographers can provide viewers with a comprehensive view of the environment and the subject’s place within it.
In conclusion, high angle shots are a versatile and powerful photography technique that can create a particular mood or emotion, provide context and perspective, and convey a sense of vulnerability or intimacy. By using this technique creatively, photographers can create visually stunning images that engage and connect with viewers.
Here are some tips to help you take great high angle shots:
Find a High Vantage Point
The first step in taking a great high angle shot is finding a high vantage point. Look for a balcony, rooftop, or hilltop that allows you to shoot the subject from above. This can add a unique and interesting perspective to the shot, and can make the subject appear smaller and more vulnerable.
Add Some Foreground Elements
Including some foreground elements can add depth and interest to the shot. Look for elements in the foreground, such as buildings, trees, or people that can help to frame the shot and create a sense of depth. This can also help to establish a sense of place and provide context for the viewer.
Try the Rule of Thirds
The rule of thirds is a compositional technique that involves positioning the subject off-center to establish a more dynamic and balanced composition. When taking high angle shots, try positioning the subject off to one side of the frame to create a sense of movement and interest. This can also help to create a more balanced composition and draw the viewer’s eye into the shot.
Play with the Depth of Field
Using a shallow depth of field can help to blur the background and make the subject stand out. This can create a sense of depth and focus the viewer’s attention on the subject. Experiment with different aperture settings to find the right balance between the subject and the background.
5. The Low-Angle Shot and Its ability to See from a New Perspective
A low angle shot is a powerful photography technique that captures a subject from below, creating a sense of power, dominance, or strength. This technique is commonly used in portrait photography, fashion photography, and cinematography to convey a particular mood or message.
Examples of low angle shots in photography include a person standing tall, a towering building, a bird in flight, or a shot of a sports player from a low angle. By capturing the subject from a lower position, photographers can emphasize the subject’s dominance and power, and create a sense of awe or intimidation.
In portrait photography, low angle shots are used to create a sense of power or strength. By capturing the subject from below, photographers can make the subject appear taller and more imposing, and convey a sense of confidence or authority.
In fashion photography, low angle shots are used to showcase clothing or accessories. By capturing the subject from below, photographers can create a dramatic and striking composition that draws attention to the details of the clothing or accessory.
In cinematography, low angle shots are used to create a particular mood or emotion. By capturing a scene from below, filmmakers can convey a sense of tension or power, or emphasize the heroism or bravery of a character.
In conclusion, low angle shots are a versatile and powerful photography technique that can create a particular mood or emotion, showcase clothing or accessories, and convey a sense of power or strength. By using this technique creatively, photographers can create visually stunning images that engage and connect with viewers.
Here are some tips to help you take great low angle shots:
Find a Low Vantage Point
The first step in taking a great low angle shot is finding a low vantage point. Look for a ground-level perspective that allows you to capture the subject from below. This can make the subject appear larger and more imposing, and can create a sense of drama and tension in the shot.
Include Some Foreground Elements
Including some foreground elements can add depth and interest to the shot. Look for elements in the foreground, such as rocks, grass, or other objects, that can help to frame the shot and create a sense of depth. This can also help to establish a sense of place and provide context for the viewer.
Use Leading Lines
Leading lines are a powerful compositional tool that can help to draw the viewer’s eye towards the subject and create a more dynamic composition. Look for natural or man-made lines in the environment, such as roads, paths, or buildings that can help to guide the viewer’s eye towards the subject.
Play with the Perspective
Experiment with the perspective by tilting the camera or shooting from different angles to create a more interesting shot. You can also try getting close to the ground and shooting upwards to create a more dramatic and dynamic composition. By playing with the perspective, you can create a unique and visually compelling image that captures the viewer’s attention.
6. The Dutch Angle Shot and Its ability to See Things from a New Angle
A Dutch angle shot is a photography technique that captures a subject at a tilted angle, which creates a sense of tension, disorientation, or unease for the viewer. This technique is also known as a canted angle or oblique angle shot.
Dutch angle shots are commonly used in horror photography, action photography, and cinematography to establish a sense of unease or chaos. By tilting the camera, photographers can create a feeling of instability or imbalance.
Some examples of Dutch angle shots include a tilted landscape, a diagonal portrait, a crooked building, or a slanted street scene. These types of shots can be used creatively to convey a sense of tension or unease in a variety of genres, including photography and film.
When using a Dutch angle shot, it’s essential to ensure that the angle is not too extreme, as this can make the shot appear gimmicky or disorienting. Additionally, photographers should consider the composition of the shot, including the placement of the subject, background, and foreground elements.
Overall, a Dutch angle shot is a powerful tool for photographers to convey a sense of tension or unease in their work. With careful consideration of composition and angle, photographers can create visually striking images that capture the viewer’s attention and imagination.
Here are some tips to help you take great Dutch angle shots:
Find a Subject with Strong Lines
Look for a subject with strong lines, such as a building, bridge, or other architectural structure. These lines will emphasize the angle of the shot and create a more dynamic composition.
Experiment with Different Angles
Try out different angles to find the best tilt for your shot. A slight tilt can add interest without being too disorienting, while a more extreme tilt can create a dramatic effect. Play around with the angle of the shot to find the one that best suits your subject.
Use the Rule of Thirds
Position your subject off-center to create a dynamic and balanced composition. The rule of thirds can be particularly effective for Dutch angle shots, as it helps to balance the visual weight of the tilted horizon.
Play with the Depth of Field
Use a shallow depth of field to blur the background and make your subject stand out. This can help to emphasize the lines and angles in your composition, and can also create a more visually interesting shot.
7. The Bird’s Eye View Shot and Its ability to See the World from Above
A bird’s eye view shot is a powerful and creative photographic technique that captures a subject from a high overhead angle, as if the camera were positioned above the subject like a bird in flight. This unique perspective offers a range of creative possibilities and can be used to convey a sense of distance, scale, or context for the subject.
Examples of bird’s eye view shots in photography are many, including cityscapes, landscapes, buildings, and shots of people gathered in public spaces. This technique is particularly useful for capturing large areas or groups of people, as it can provide context and show the scale of the subject.
The bird’s eye view shot is also an effective tool for creating a sense of depth and dimension in the image. By capturing the subject from a high angle, the photographer can convey a sense of height and depth that is not possible with other photographic techniques. This can be particularly effective in landscape photography, where the bird’s eye view shot can capture the full scope of the terrain and provide a sense of the landscape’s scale and majesty.
To execute a bird’s eye view shot effectively, the photographer must carefully consider the location and angle of the camera. This requires an understanding of the technical aspects of photography, such as aperture, shutter speed, and ISO, as well as an eye for composition and framing.
In conclusion, the bird’s eye view shot is a creative and powerful photographic technique that offers a unique perspective on the subject. Whether used in cityscapes, landscapes, or any other setting, the bird’s eye view shot is an effective way to create a visually engaging image that conveys a sense of distance, scale, and context.
Here are some tips that can help you achieve great results:
Find a high vantage point
Look for a high location from which you can shoot your subject from above. This could be a rooftop, hill, or balcony, depending on the scene you’re trying to capture. By shooting from a high vantage point, you can create a unique perspective that adds depth and interest to your photos.
Use a wide-angle lens
A wide-angle lens can help you capture a large area and create a sense of scale for your subject. This is particularly useful if you’re shooting landscapes or cityscapes, where you want to capture as much of the scene as possible.
Pay attention to the foreground
Including some foreground elements in your shot can add depth and interest to your photo. This could be anything from a tree branch to a person walking by. By including these elements in your composition, you can create a more immersive experience for the viewer.
Use leading lines
Leading lines are a powerful composition tool that can help draw the viewer’s eye towards the subject. Look for natural lines in your scene, such as roads, buildings, or rivers, and use them to create a more dynamic composition.
8. The Worm’s Eye View Shot and Its ability to See the World from Below
A worm’s eye view shot is a powerful camera angle that captures a subject from a low angle, as if the camera were positioned on the ground looking up at the subject. This type of shot is perfect for creating a sense of power, dominance, or intimidation for the subject, as it emphasizes their size and strength from a unique and unusual perspective.
Worm’s eye view shots are commonly used in portrait photography, fashion photography, and cinematography to create dramatic and powerful images. Some examples of this type of shot might include a towering building, a majestic tree, a soaring bird, or a person or animal standing tall and proud.
Whether you’re a professional photographer looking to add a unique and dynamic angle to your shots or an amateur photographer looking to experiment with new techniques, a worm’s eye view shot is a powerful and versatile tool that can help you create unforgettable images. So why not give it a try and see what amazing shots you can capture from this unusual and captivating perspective?
Here are some tips to improve your skills in this genre:
Find a low vantage point
Look for a low location from which you can shoot your subject from below. This could be ground level, a stairway, or a hill slope, depending on the scene you’re trying to capture. By shooting from a low vantage point, you can create a dramatic and dynamic composition that adds depth and interest to your photos.
Use a wide-angle lens
A wide-angle lens can help you capture a large area and create a sense of scale for your subject. This is particularly useful if you’re shooting landscapes or architecture, where you want to emphasize the size and grandeur of the scene.
Pay attention to the background
When shooting from a low vantage point, it’s important to pay attention to the background. Keep it simple and uncluttered so that the subject remains the focus of the shot. Avoid distracting elements that could pull the viewer’s attention away from the subject.
Use leading lines
Leading lines can help draw the viewer’s eye towards the subject and create a more dynamic composition. Look for natural lines in your scene, such as the horizon, a road, or a building, and use them to create a sense of movement and depth.
9. The Over-the-Shoulder Shot and Its ability to Get a New Perspective
Over-the-shoulder shots are a widely used photographic technique employed in film and television production to capture the dynamics of dialogue and interaction between characters in a scene. This technique offers a distinctive perspective of the characters’ emotions and expressions while also revealing their spatial relationship to each other.
The over-the-shoulder shot typically involves positioning the camera behind one character’s shoulder and capturing the other character in the frame. This creates a sense of depth and dimension to the scene while also highlighting the characters’ facial expressions and body language. The shot is often used to convey a sense of intimacy and emotional connection between the characters, as well as to emphasize their individual perspectives and points of view.
Over-the-shoulder shots have been used in numerous classic films, such as the iconic “Casablanca” and “Gone with the Wind,” and continue to be a staple in modern television dramas like “Breaking Bad” and “Game of Thrones.” This technique is an essential tool for filmmakers and photographers to convey the subtleties of human interaction and create compelling visual storytelling.
Here are some tips that can help you improve your over-the-shoulder shots and elevate your visual storytelling:
Pay attention to framing
The framing of your shot can make a significant difference in how your shot is perceived. It’s essential to ensure that the shoulder of the character in the foreground does not block too much of the other character’s face. You can use the rule of thirds or the golden ratio to balance your composition and create a more visually pleasing shot.
Watch the eyeline
The eyeline of the character in the foreground should be aimed toward the character in the background. This creates a connection between the two characters and helps to establish the relationship between them.
Adjust the camera height
The camera height can also affect the perception of the characters in the shot. In general, a slightly higher angle can create a sense of dominance or power for the character in the foreground. On the other hand, a lower angle can create a sense of vulnerability or weakness. Experiment with different camera angles to find the right one for your shot.
Use depth of field
Depth of field is a powerful tool that can help you draw attention to the characters in the foreground. A shallow depth of field can help to blur the background and keep the focus on the characters in the foreground. This can be particularly useful if you want to create a sense of intimacy or focus on the emotions of the characters.
10. The Panning Shot and Its ability to Capture Motion and Action
A panning shot is a popular photographic technique used to convey motion and movement in a scene. This dynamic camera angle involves moving the camera horizontally while keeping the subject in the frame, resulting in a blurred background and a sharp, focused subject. The panning shot is a powerful tool for visual storytelling, as it can effectively capture a sense of speed, action, and energy.
The panning shot is frequently used in sports photography to capture the movement of athletes, such as racing cars, cyclists, and runners. It is also a popular technique in nature photography, where it can be used to capture the motion of birds and animals in their natural habitat. The panning shot can be used in a variety of settings, from fast-paced action scenes to serene landscapes, and can create a dynamic visual experience for the viewer.
To execute a panning shot successfully, the photographer must follow the movement of the subject with the camera while maintaining a steady focus on the subject. This requires careful coordination of the camera movement and timing to ensure that the subject remains in focus while the background is blurred. The result is a compelling and visually engaging image that conveys a sense of motion and energy.
In conclusion, the panning shot is a valuable technique for photographers and filmmakers alike, offering a powerful tool for capturing motion and movement in a scene. Whether used in sports photography, nature photography, or any other setting, the panning shot is an effective way to create a dynamic and visually engaging image.
Here are some tips to help you improve your panning shots:
Use a slower shutter speed
A slower shutter speed allows for more motion blur in the background while keeping the subject in focus. This can create a sense of movement and speed in the shot, adding to the dynamic effect. However, it’s essential to find the right balance between motion blur and subject sharpness, as too much blur can make the shot appear blurry and out of focus.
Keep the subject in the frame
As you move the camera horizontally, it’s crucial to keep the subject in the frame. This can be challenging, as you need to maintain the right speed and movement to keep the subject in focus. One technique to achieve this is to lead the subject with the camera and follow its movement.
Follow the subject’s movement
To keep the subject in focus, it’s crucial to follow its movement as you move the camera horizontally. This means anticipating the subject’s movement and adjusting the camera accordingly. It can take some practice to get it right, but with patience and dedication, you can master the technique.
Use a tripod or stabilizer
Panning shots require steady movement and a stable camera. Using a tripod or stabilizer can help to keep the camera steady while taking planning shots as you move it horizontally. It can also help to reduce camera shake and create a smoother shot.
11. The Zoom Shot and Its ability to Get Up Close and Personal
Zoom angle shots are a widely used photographic technique employed to capture a subject up close and personal. This technique involves adjusting the focal length of the camera lens to either zoom in or out, thereby adjusting the size of the subject in the frame. The zoom angle shot is a powerful tool for visual storytelling, as it allows the photographer to highlight specific details and create a sense of depth and dimension in the image.
Zoom angle shots can be used in a wide variety of settings and are suitable for capturing a range of subjects, including the face of a model, the intricate details of a rock face, a soccer player scoring a goal, or a bird in flight. This technique is particularly useful when the photographer wants to focus on specific details while also providing context for the subject.
Zoom angle shots offer a range of creative possibilities and can be used to convey a variety of emotions and moods. For example, a zoomed-in shot of a person’s face can capture their emotions and convey intimacy, while a zoomed-out shot of a majestic landscape can create a sense of awe and wonder.
To execute a zoom angle shot effectively, the photographer must carefully adjust the focal length of the camera lens to achieve the desired effect. This requires an understanding of the technical aspects of photography, including aperture, shutter speed, and ISO, as well as an eye for composition and framing.
In conclusion, zoom angle shots are a powerful tool for photographers and filmmakers alike, offering a versatile technique for capturing subjects up close and personal while also providing context and depth to the image. Whether used in portrait photography, landscape photography, or any other setting, the zoom angle shot is an effective way to create a visually engaging image that conveys a range of emotions and moods.
Here are some tips to help you improve your zoom shots:
Know your lenses
Different lenses have multiple zoom capabilities. It’s essential to know your equipment and understand how to adjust the focal length to achieve the expected effect. A zoom lens can help you get closer to your subject and create a sense of depth in your shots. However, be aware that the quality of the image can vary depending on the lens and the focal length used.
Pay attention to the background
When zooming in on your subject, it’s easy to lose track of what’s happening in the background. It’s crucial to be mindful of what is in the background and adjust the aperture if needed to keep the entire image in focus. A shallow depth of field can create a blurry background, which can be useful for portraits and isolating your subject from the surroundings. On the other hand, a deep depth of field can help to keep everything in focus, which can be useful for landscapes and architecture shots.
Use a remote shutter release
Pressing the camera’s shutter button can cause slight camera movement, resulting in a blurry image. Using a remote shutter release can help to minimize camera shake and ensure a sharper image. It’s especially useful when using longer focal lengths, as the slightest movement can be magnified, causing the image to become blurry.
Summarize
“11 Popular Camera Angles for Photographers” provides a comprehensive guide to understanding and utilizing different photography angles to create visually interesting and engaging images. By exploring the fundamental principles of photography, photographers can master techniques such as composition, lighting, and subject placement, and use different angles to add depth, perspective, and drama to their shots. The article emphasizes the importance of experimentation and creativity, encouraging photographers to push the boundaries of what’s possible. Overall, mastering different angles and techniques is crucial for photographers looking to improve their skills and capture the world around them through the lens of their camera.